Integrations
Configure Notion as Bug Tracker
Integration overview
In this guide, we’re going to build an internal Notion integration that can export bugs from Test IO to your Notion database.
Before diving in, let’s quickly review Notion integrations. They need to be authorized (i.e., given explicit permission) to make any changes your workspace.
Requirements
To follow along with this guide, you will need:
- A Notion account.
- To be a Workspace Owner in the workspace you’re using. You can create a new workspace for testing purposes otherwise.
Create your integration in Notion
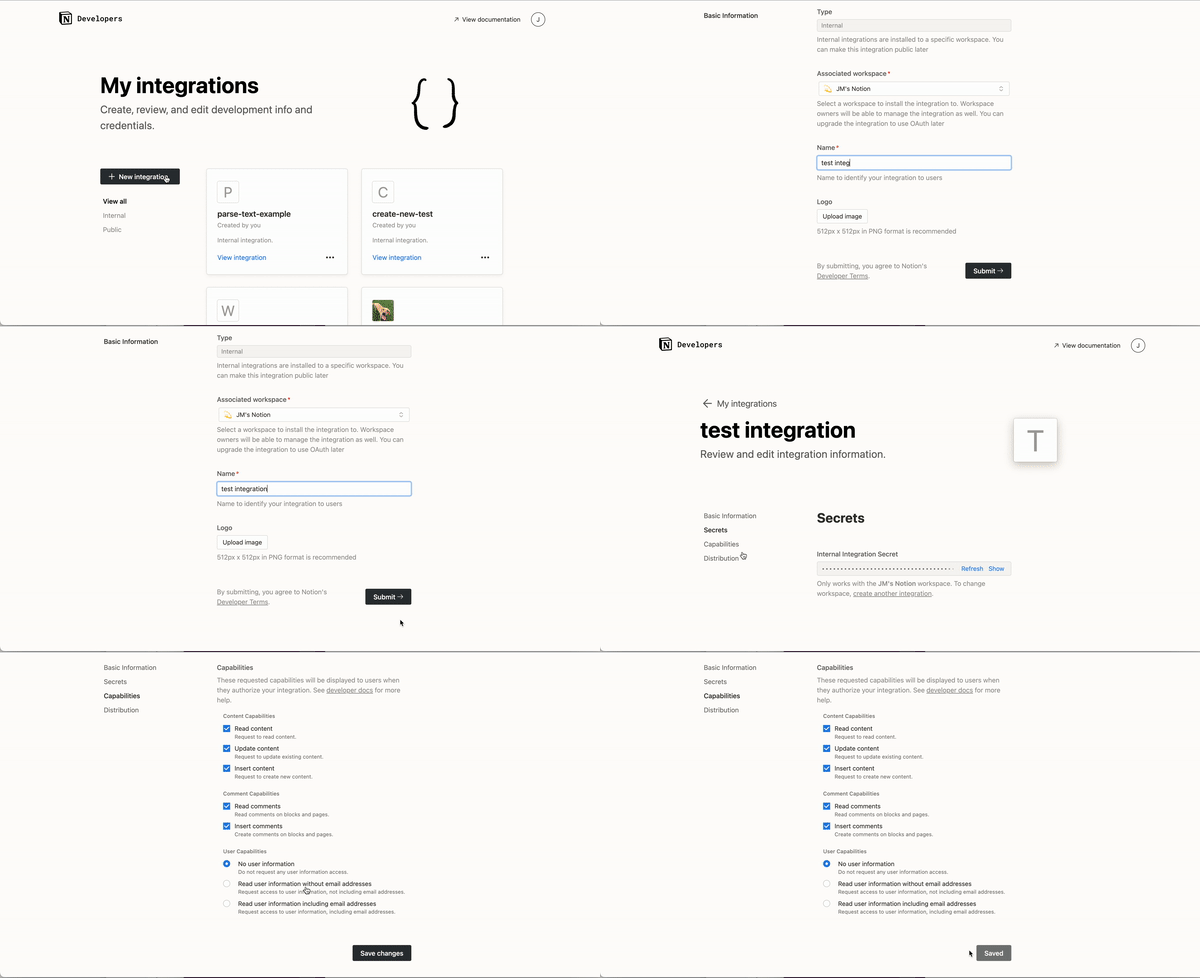
The first step for building any internal integration is to create a new integration in Notion’s integrations dashboard: https://www.notion.com/my-integrations.
- Click
+ New integration - Enter the integration name.
- Update the
Capabilitiesto allow comment creation.

Get your API secret
API requests require an API secret to be successfully authenticated. Visit the Secrets tab to get your integration’s API secret (or “Internal Integration Secret”).

Do not expose your secret to public. In Test IO we store secrects encrypted.
Give your integration page permissions
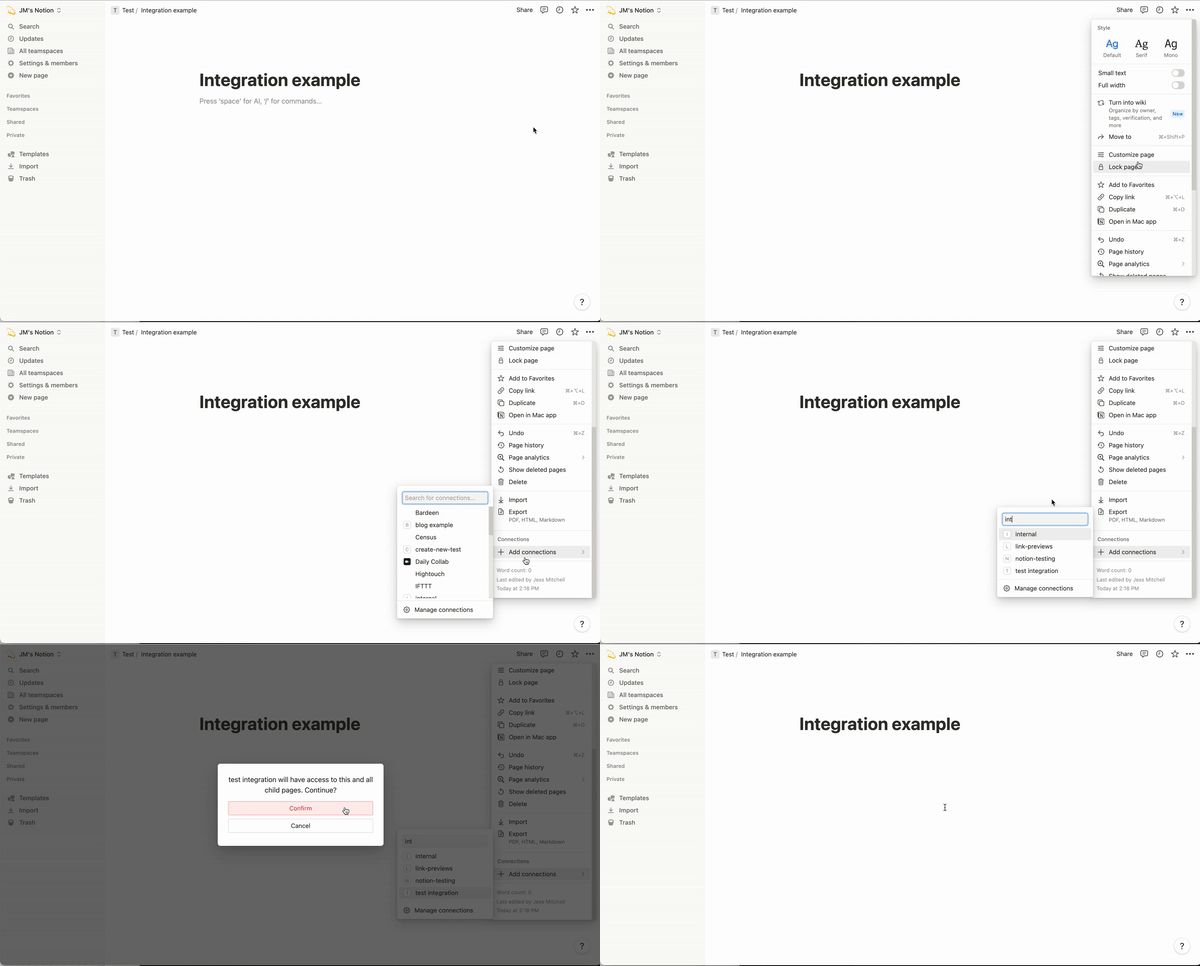
The database that we’re about to create will be added to a parent Notion page in your workspace. For your integration to interact with the page, it needs explicit permission to read/write to that specific Notion page.
To give the integration permission, you will need to:
- Pick (or create) a Notion page.
- Click on the
...More menu in the top-right corner of the page. - Scroll down to
+ Add Connections. - Search for your integration and select it.
- Confirm the integration can access the page and all of its child pages.

Create Bug Tracker in Test IO
Now that you've got the API secret from the previous steps, it's time to proceed with creating a new bug tracker connection on the Test IO side!