Jira Cloud Plugin
Accept Test IO Bug
Once you have reviewed the received Test IO bug with an open status, you can begin the triaging process. If you validate the bug and would like to export it to your Jira, follow these steps:
- Select Bug: From the Bug Triage section, choose a specific open Test IO bug from the list.
- Accept Bug: Click the “Accept” button in the expanded bug details on the right.
The Test IO bug is accepted, and an associated Jira ticket is created based on the previously defined mapping rules in the Configurations -> Issue Type and Fields Mapping section.
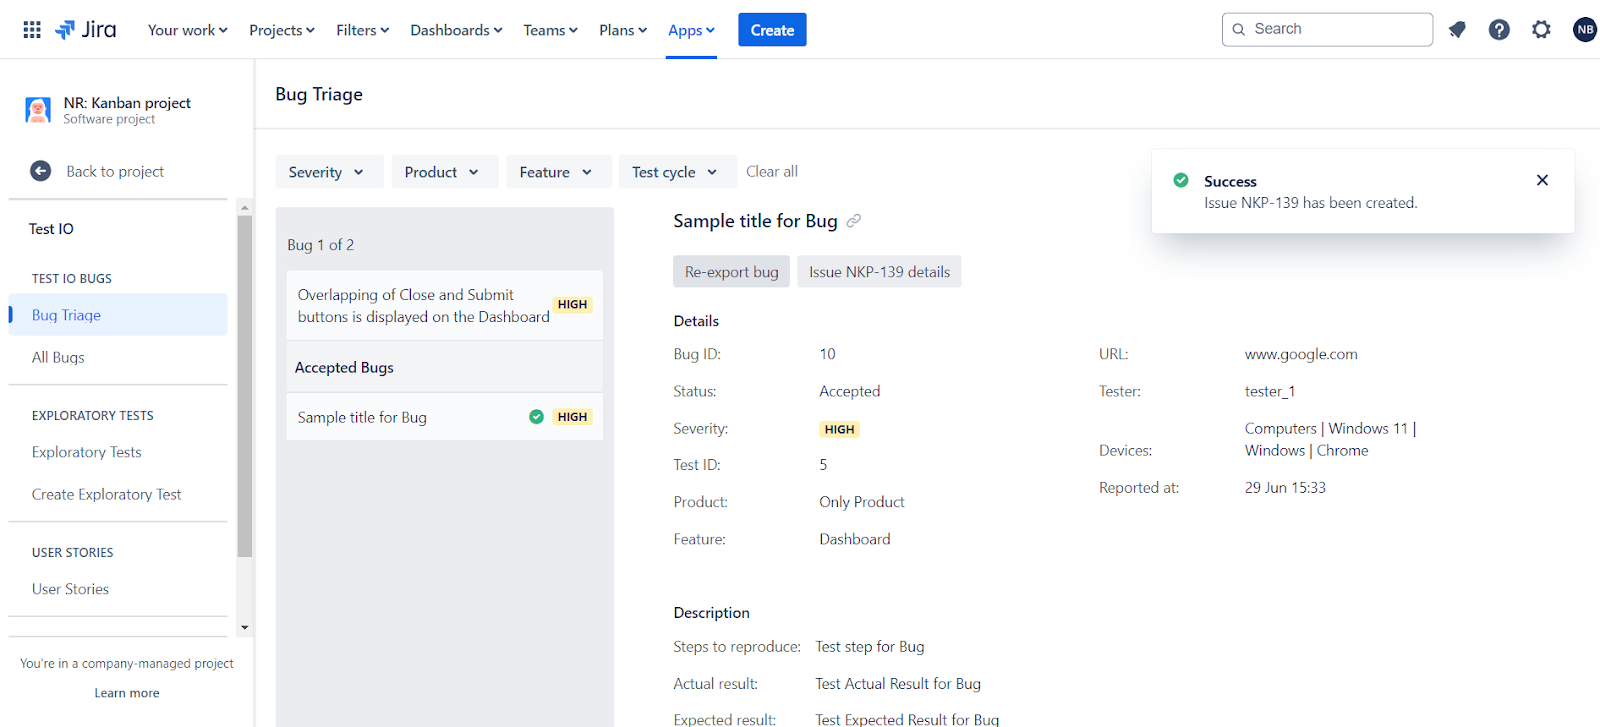
The accepted bug is removed from the open bugs list and moved to a new "Accepted Bugs" section, which temporarily appears after the list of open bugs. After reloading the page, this section is no longer accessible.
Actions for Accepted Bugs:
Re-export: Re-create another Jira issue ticket for the same Test IO bug.
View Issue Details: Navigate to the newly created Jira issue page.

Accepted Bug on Bug Triage
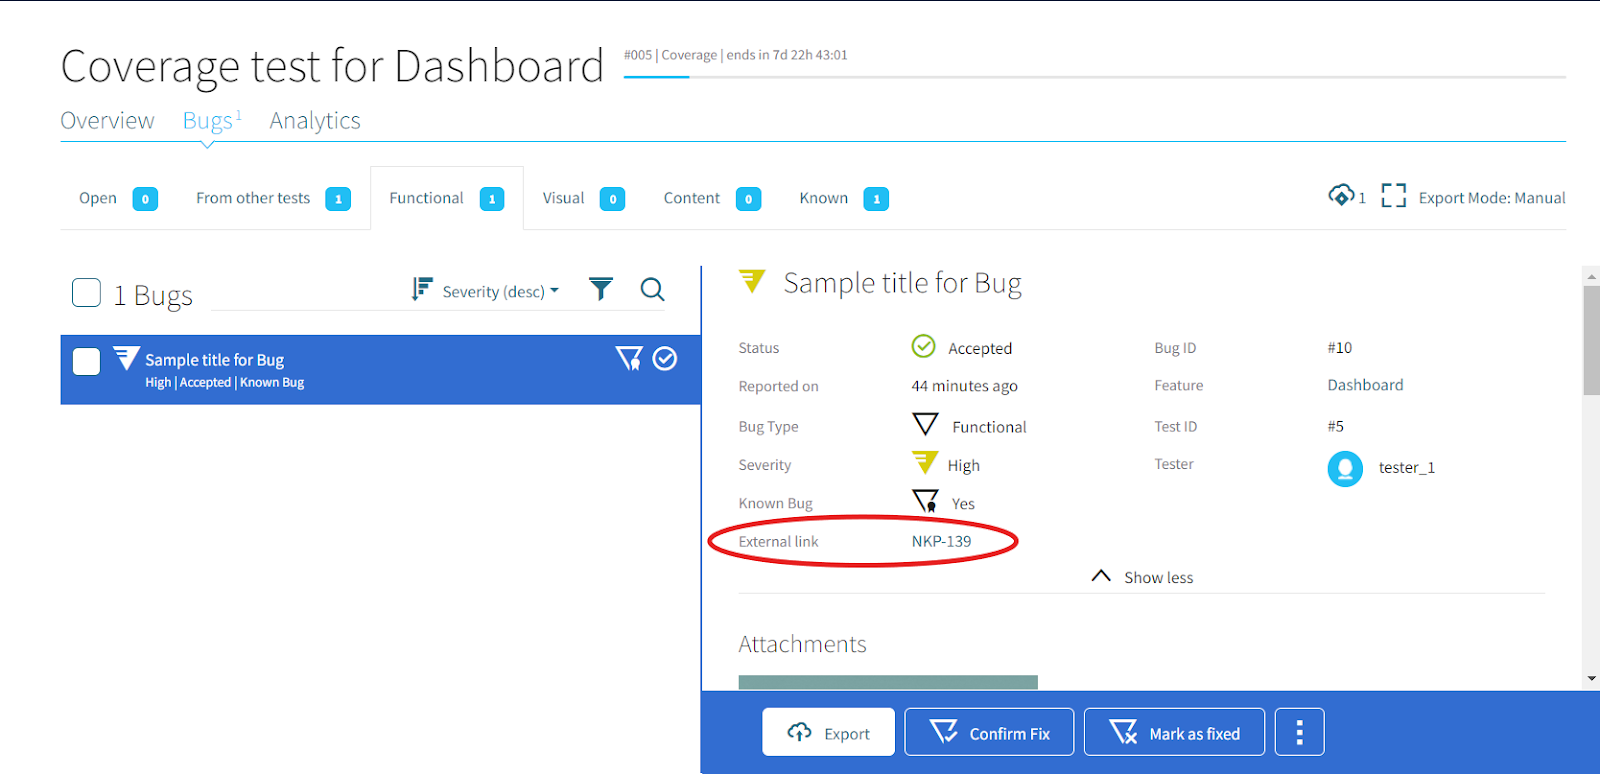
Once the Test IO Bug is exported to Jira, a new Jira issue link is added as an External link under the Test IO bug details on the Test IO side.

Bug Fix Confirmation
Verify bug fixes for Test IO and Jira Bugs